Availability & Fault Tolerance
Latency and cost are easy to talk about. Availability under failure is the dimension that decides whether a controller belongs in production. The availability benchmark simulates AZ degradation - increasing latency and partial Pod failures in one zone - and measures how the cluster responds.
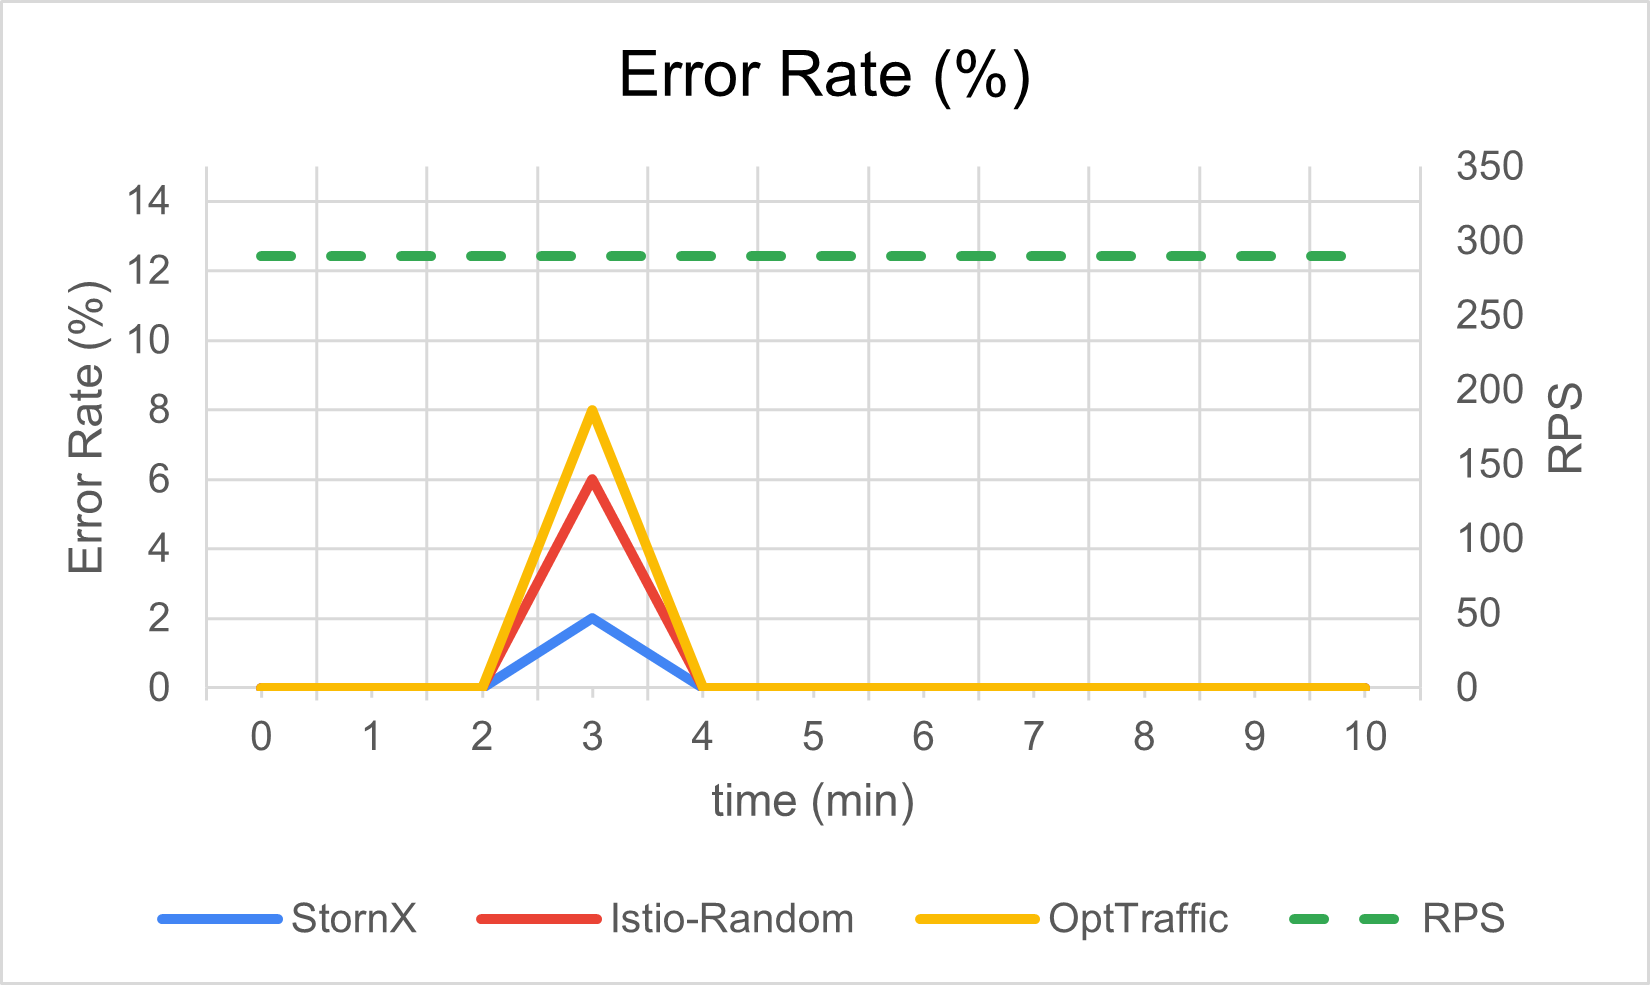
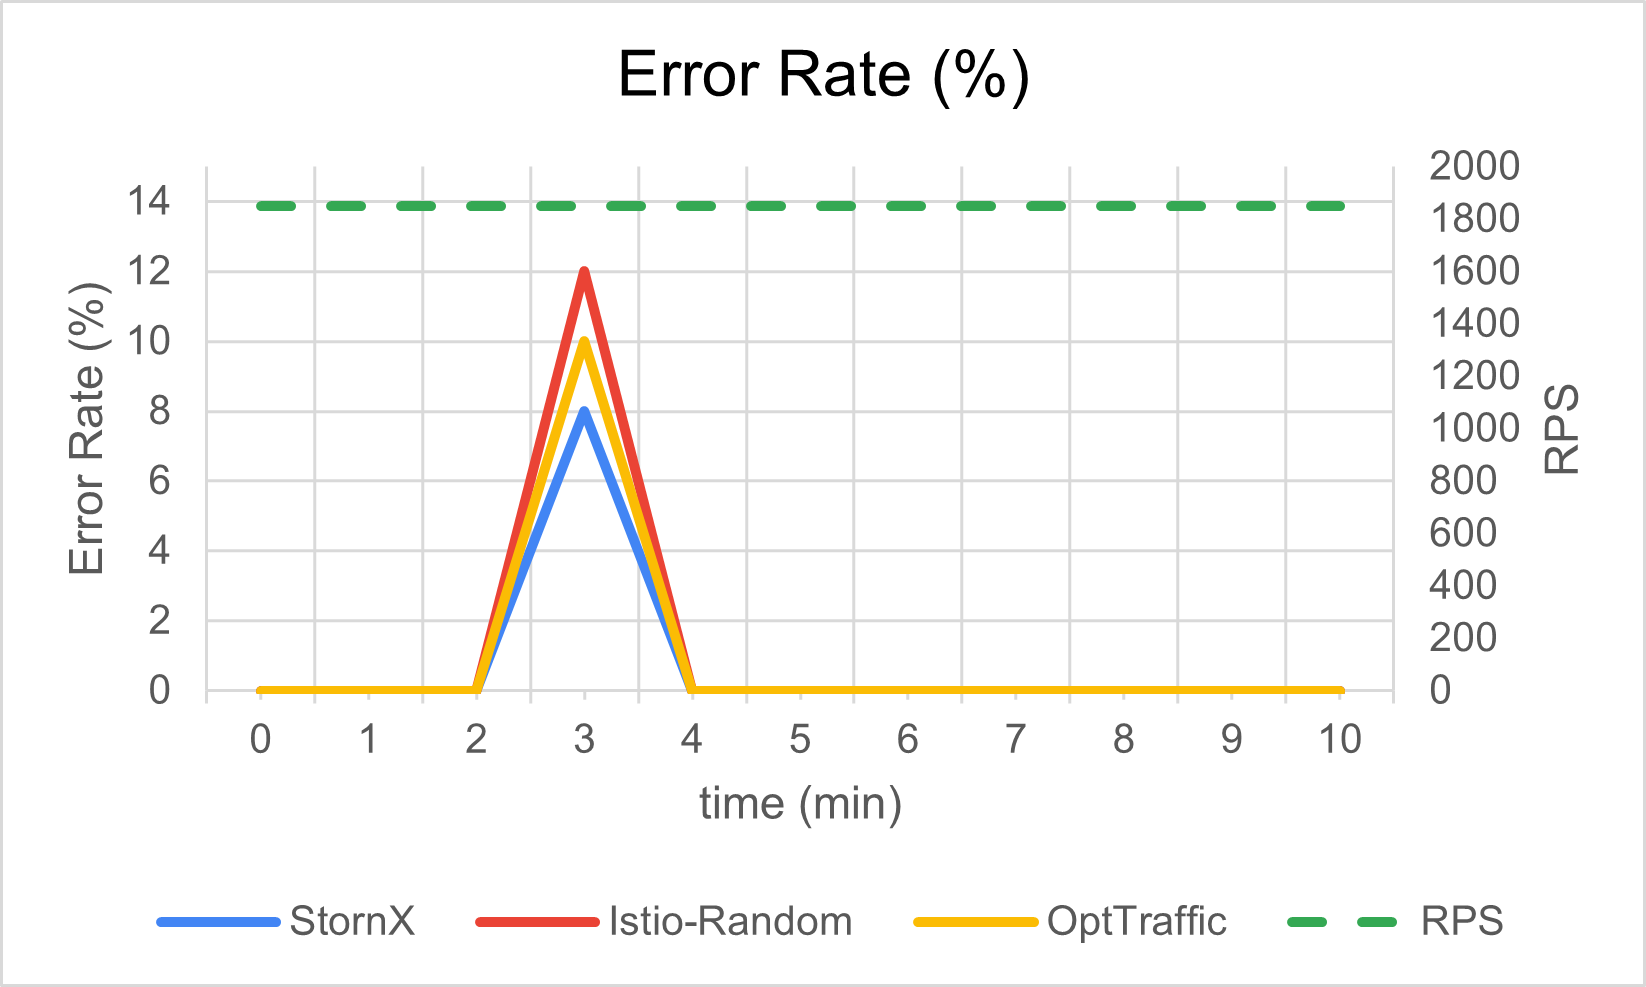
What was simulated
- A 3-AZ EKS cluster running Online Boutique at steady-state load.
- One AZ is artificially degraded: Pod latency rises, a subset of Pods are killed.
- The other two AZs remain healthy.
The question: how much error rate does the application emit during the event, and how quickly does it recover?
Error rate during zone degradation
Throughput preservation during the event
The cluster keeps serving requests at the target rate while the bad zone is being drained:

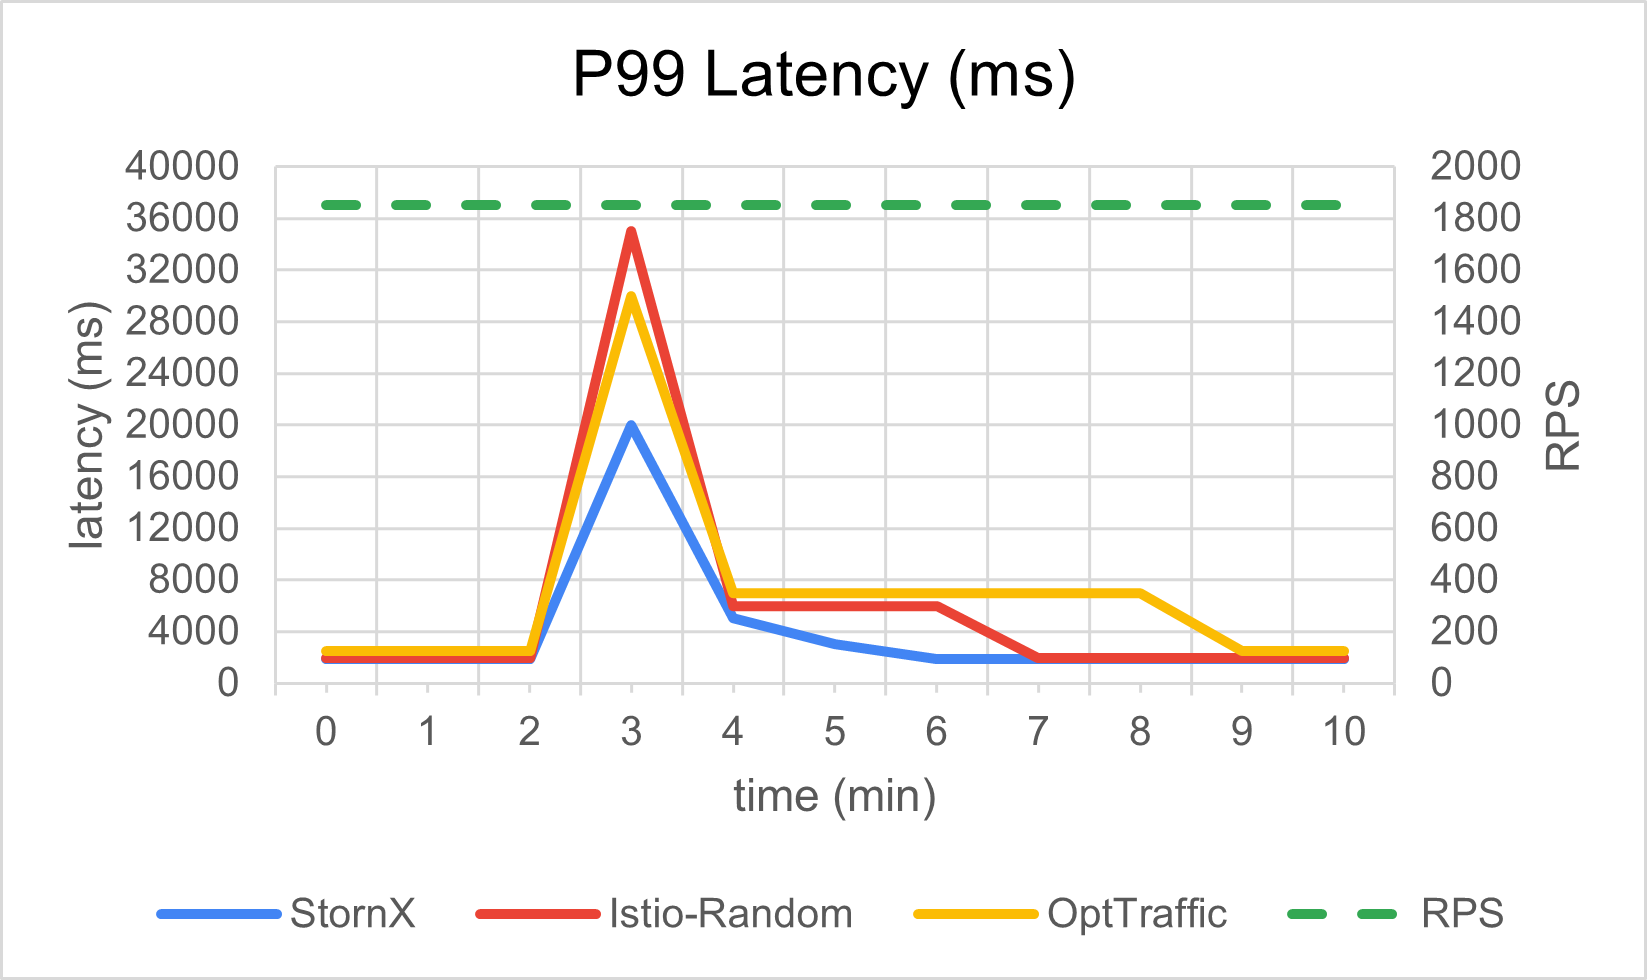
Why the curves look different
Two architectural choices in StornX combine to produce the smoother curve:
- OptiBalancer reacts within one cycle. As soon as the bad zone's P95 rises, its weight starts dropping. By the time the baseline's circuit breakers trip, StornX has already routed most traffic away.
- OptiScaler places replacement replicas correctly. When killed Pods come back, they land in the healthy zones rather than recreating the same hot spot.
The result is graceful failover: the application does not stop serving, the user does not see errors, and the cluster reaches its new steady state without operator intervention.
What this means for SLOs
If your SLO is expressed in terms of error budget, the availability test is a direct proxy for how much budget you spend per zone incident.
A controller that turns a 30-second error spike into a 30-second latency spike (with no errors) is materially cheaper for an error-budget-driven operations team.
Continue with Comparison for the summary table that teams usually paste into an internal review document.